Create your venue
Create an account, confirm your email address and fill in your venue's details. You only decide whether to pay after the 30-day trial.
You start with a free 30-day trial, without a payment card. Whoever creates the venue becomes its admin: you can set up everything and later make others admin too.
Create your account
-
Go to app.barplanner.be/aanmelden.
-
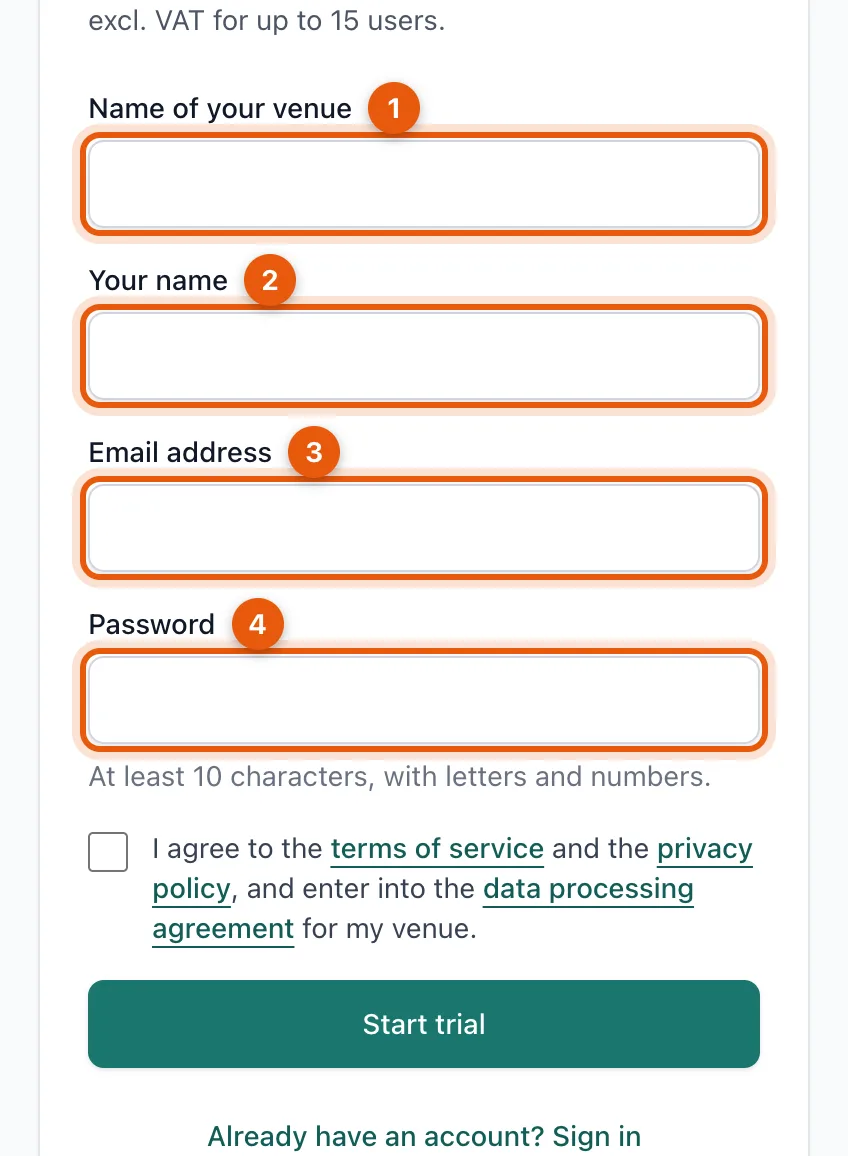
Fill in the Name of your venue (1), Your name (2), your Email address (3) and a Password (4). The password has at least 10 characters, with letters and numbers.
-
Tick that you agree to the terms and click Start trial.
-
Open the email Confirm your email address and click the link. You then go straight to the welcome wizard.
Set up your venue
The wizard has three short steps: your venue, your positions and your team. In the first step you check:
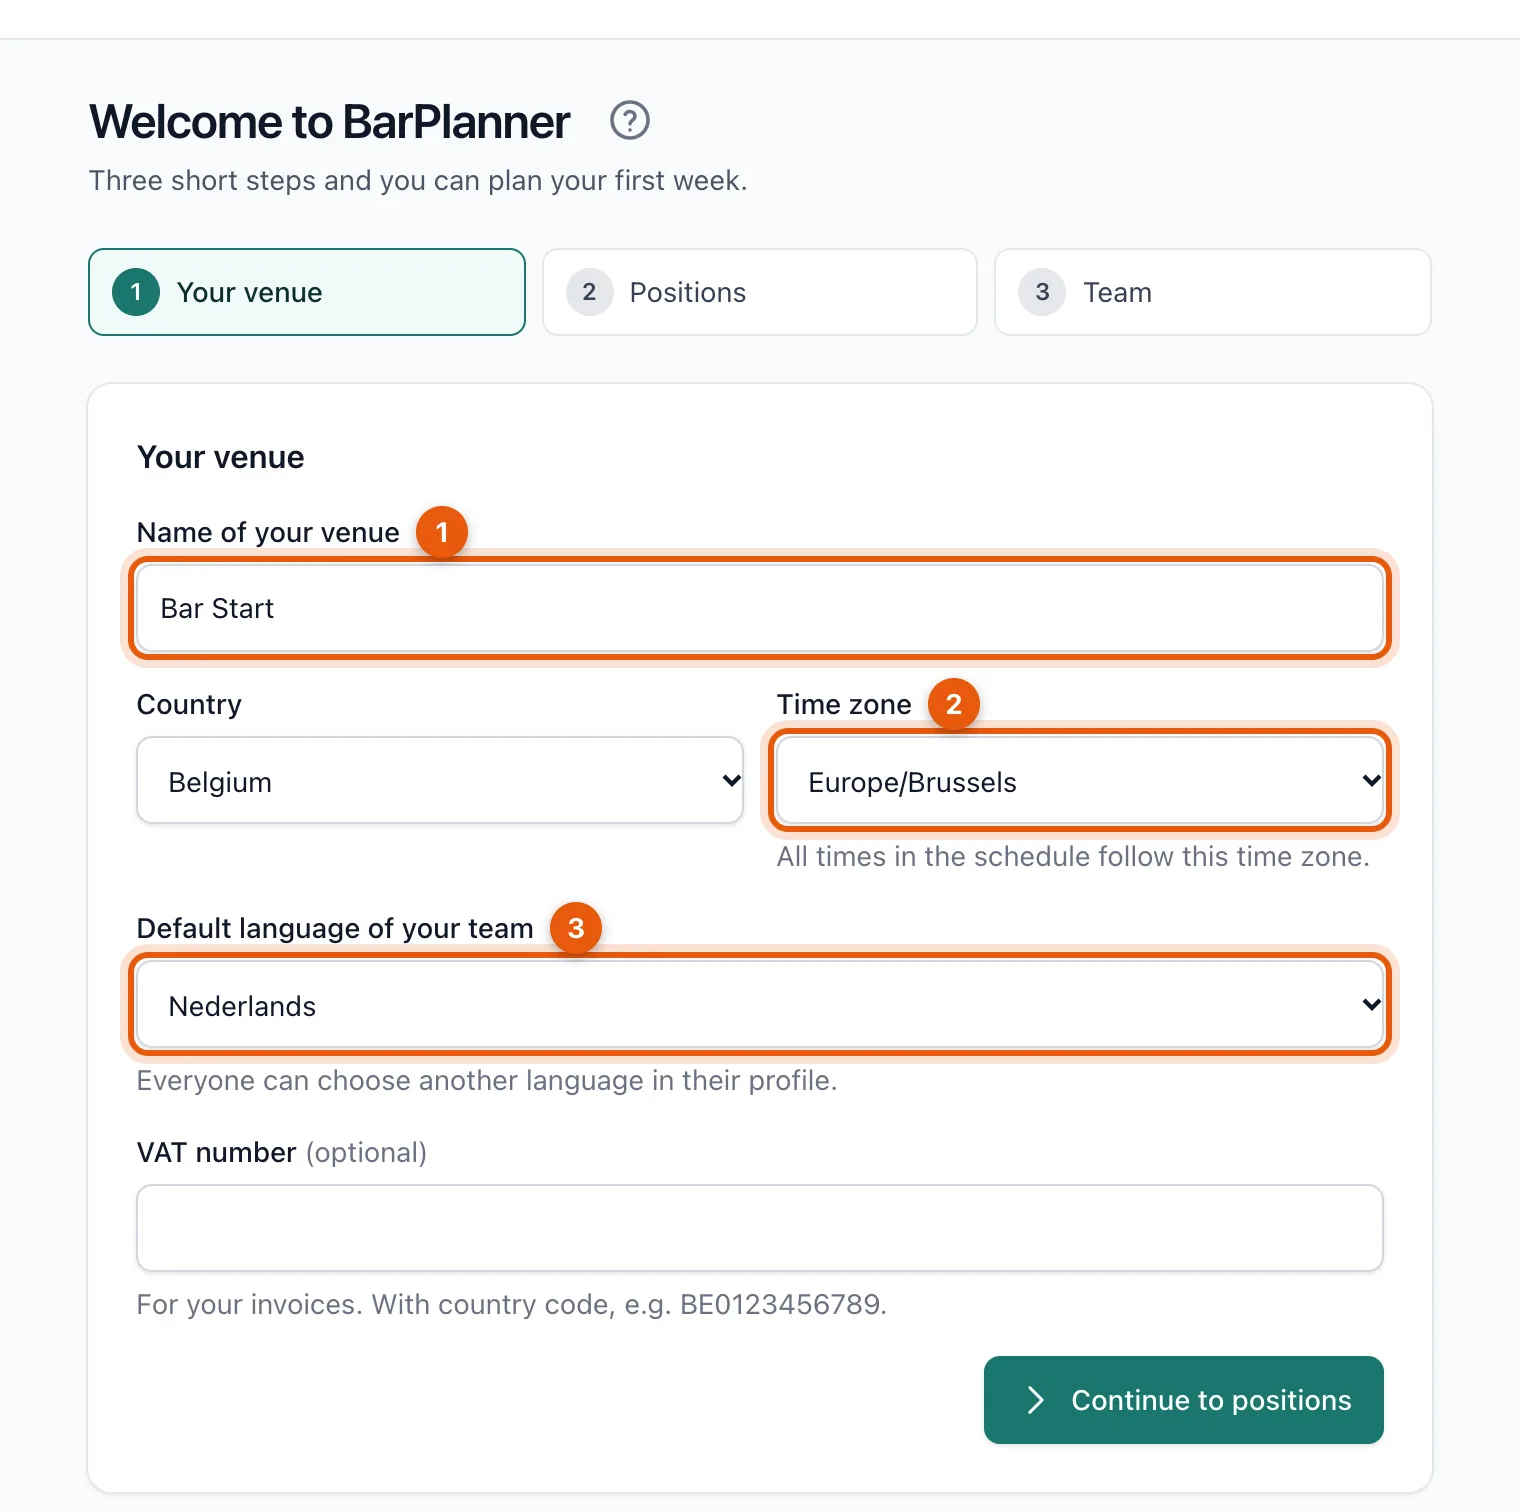
- Name of your venue: this is how your employees see it in the app.
- Time zone: all times in the schedule follow this time zone. For Belgium that is Europe/Brussels.
- Default language of your team: the language new employees see the app in. Everyone can choose a different language later in their profile.
The VAT number is optional; you need it for invoices in your venue's name (with country code, e.g. BE0123456789). Click Continue to positions.
Related articles
- Set up positionsPositions are the spots you fill in each shift, like Bar and Floor. You choose them in the second step of the welcome wizard.
- Invite your teamInvite employees with their name and email address. They get a personal link, which you can also send yourself via WhatsApp.
- Plan and publish your first weekCreate time blocks, choose who works in each position and publish the week. Your team only sees the schedule after you publish.
Didn’t find what you were looking for? Search again: